Pages

Friday, November 4, 2011

Desk Before & After

What I have to share with you today is a project I completed over more than a year ago, but still absolutely love! This project is proof that despite trends and what's cool today, choosing a piece of furniture with good bones always proves to be a good investment! I purchased this desk on Boston's craigslist for a whopping $20! (I know, quite the investment) The story of going to pick this desk up is actually kind of funny, just imagine me and my boyfriend with less then a few hours of sleep driving an hour to pick up a desk and having it barely fit into the drunk! Anyways, the inspiration I had for my desk was this picture of a campaign style dresser from Lonny Magazine.
via Little Green Notebook


Here is the original picture that was posted on Craigslist. I was attracted to the simple lines and the brass campaign style hardware, and I knew I could make it something special like the inspiration image.

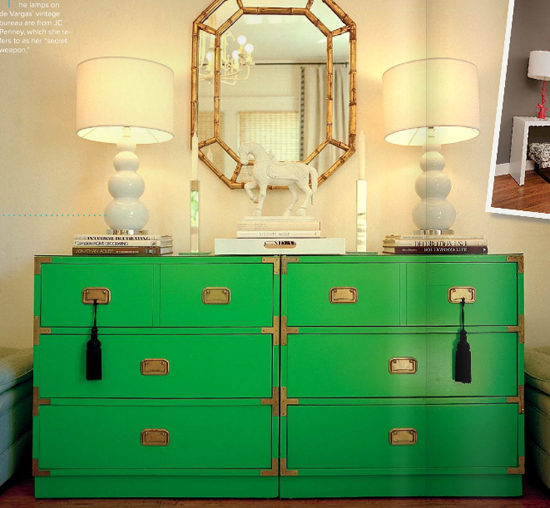
If you are interested in refinishing your own piece, here is a little step by step tutorial of how I went about refinishing this desk to achieve the look of the inspiration image! First I removed all the brass hardware carefully with a flat scraper and unscrewed the handles. I then gave it a good overall sand with a hand held sander until it looked like this:
 I then wiped it all down with a tacky cloth purchased at Home Depot to remove any left over dust from the sanding and began applying two coats of gray latex primer until it looks like this:

 Sorry for the not so great pictures but the key to this step and with any steps involving paint, are multiple really really thin coats. If your piece is solid wood like my piece is, you want to be able to see the wood grain through the paint and the only way to do that is with thin coats! After the primer is allowed time to dry, you can now begin applying a top coat of paint. For this project I purchased a quart of Behr's "Pepper Grass" and used a good quality 2" brush. You can choose to use a roller, but I liked the control of a brush instead. I applied three really thin coats of the green, allowed it to dry and then applied a coat of wipe on polyurethane with a clean, lint free rag. After I allowed the polyurethane to fully dry I reattached the brass hardware and ended up with this:
 And the styled version, ignore the ugly outlet please!:
A year later and I still love this piece and it has held up really well! I was especially honored to have this project featured on Design Sponge's before and after feature here. What about you? Have you ever found a piece of furniture based on an inspiration picture? Or maybe you just refinished a piece you had laying around the house? I'd love to see!

No comments:

Post a Comment